Fujifilm WiFi Connection Guide
Welcome to the Fujifilm connection guide! The process of connecting Cascable Pro Webcam to your camera is usually very simple. This guide will walk you through the steps.
Contents
Before We Start
- Make sure your camera is supported by Cascable Pro Webcam.
- Check that your camera’s firmware is up-to-date.
- Check that Cascable Pro Webcam is up-to-date.
If Connection Attempts Fail
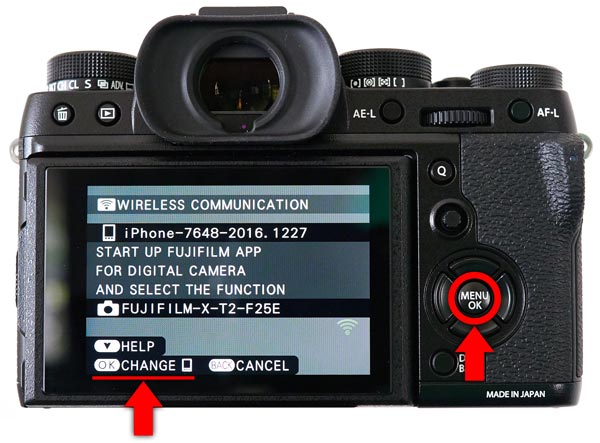
If you’ve used your Fujifilm camera over WiFi using other apps, connection attempts from Cascable Pro Webcam can be rejected. To solve this, when enabling WiFi on your camera press the OK - CHANGE button to set up a new pairing before connecting your Mac to its network. The connection should then succeed.
Connecting Cascable Pro Webcam to Your WiFi-Enabled Camera
-
Press the Menu button on your camera and navigate to SHOOTING MENU section.
-
In the SHOOTING MENU section, navigate to WIRELESS COMMUNICATION and press the OK button.
Note: Many Fujifilm cameras have a dedicated WiFi button, or will allow you to configure a function button to enable WiFi. Consult your camera’s manual for more information.
-
On your Mac, click the
 Wi-Fi indicator in the menu bar, then select the WiFi network and enter the password that’s displayed on your camera’s screen (if any).
 -
Launch Cascable Pro Webcam. It should automatically detect and connect to your camera. If not, click the Connect… button to search for your camera.
-
For the first connection, your camera needs to be paired with the connecting app. If this is the case, Cascable Pro Webcam will show this dialog:
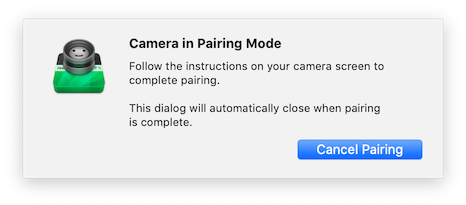
Cascable Pro Webcam’s pairing dialog.
- To continue, look at your camera and press OK to confirm the pairing request from Cascable Pro Webcam.
That’s it – you’re connected!
Stuck?
If you’re struggling to get Cascable Pro Webcam connected to your camera, check out our troubleshooting guide.


